Author

drdavidfyffe

Browsing

Temporary Crown Remover

After practicing dentistry for over 25 years, I saw that there was a noticeable VOID in instrumentation when it came to temporary crown removal.  

There were no decent tools available made to effectively remove provisionals – Many were poorly designed, always slipping.

It was then that I decided to embark on a quest to invent the perfect temporary remover.  

After much trial and error, experimentation and testing, I eventually came up with the final version of the tool I call TempOff®.  I am happy to say that over thousands of dentists have switched.
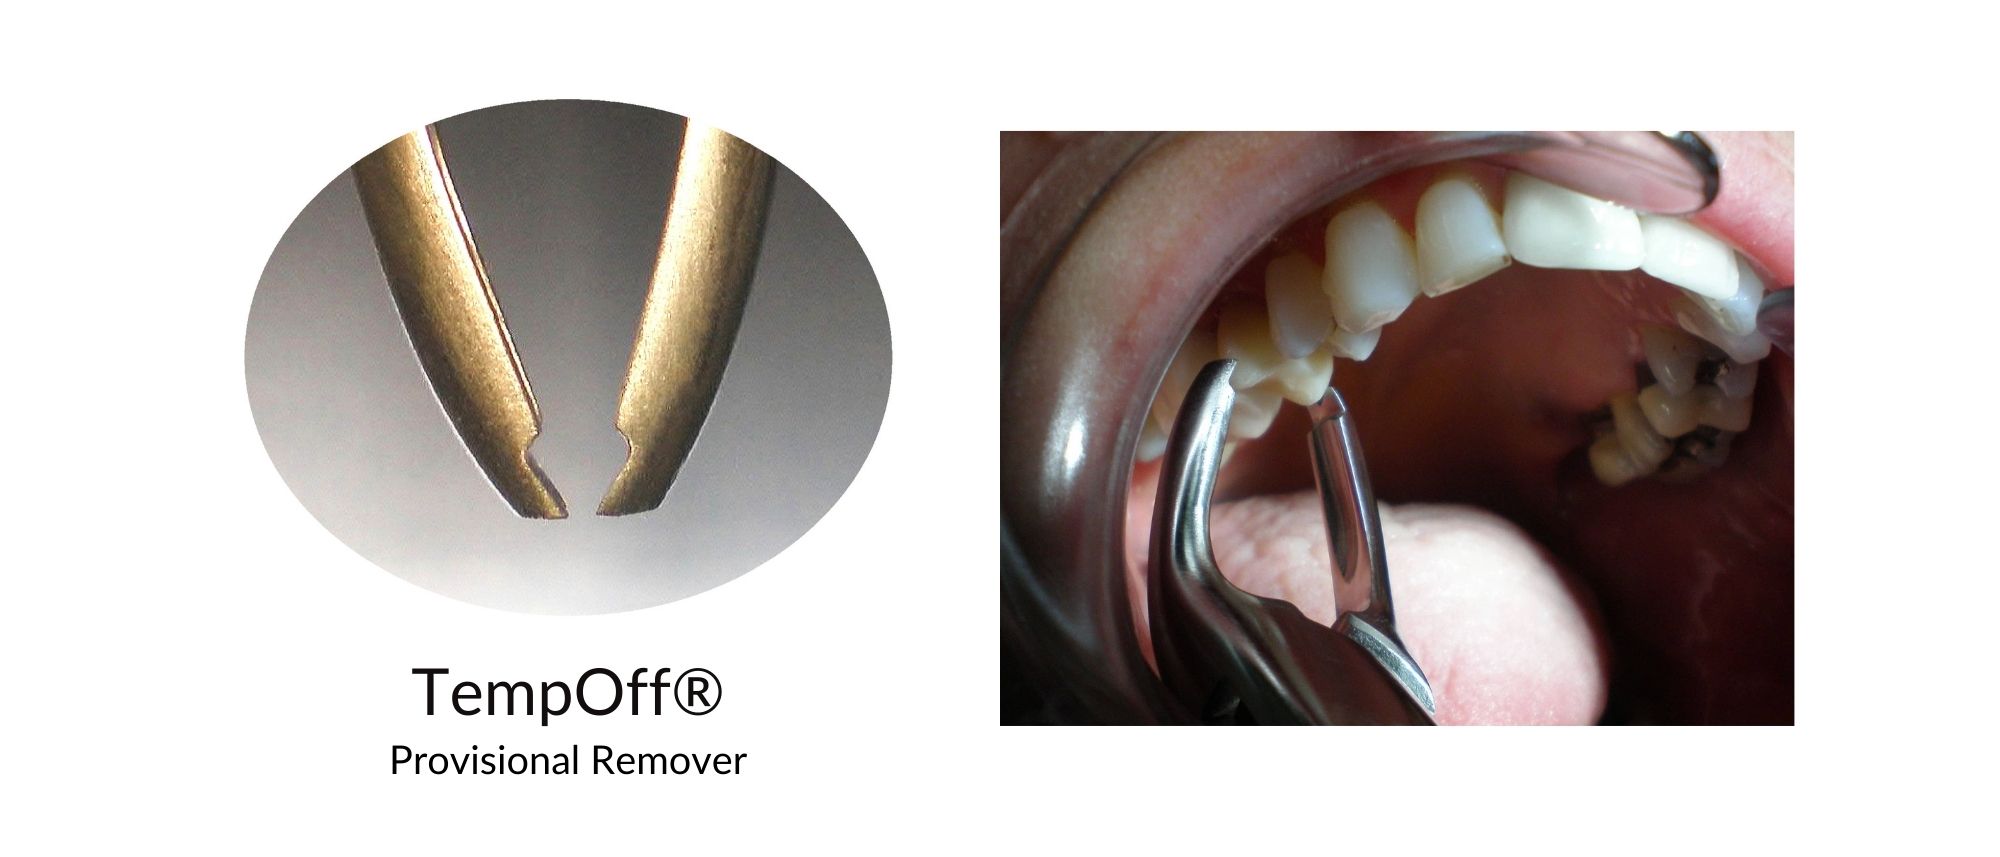
How it works:

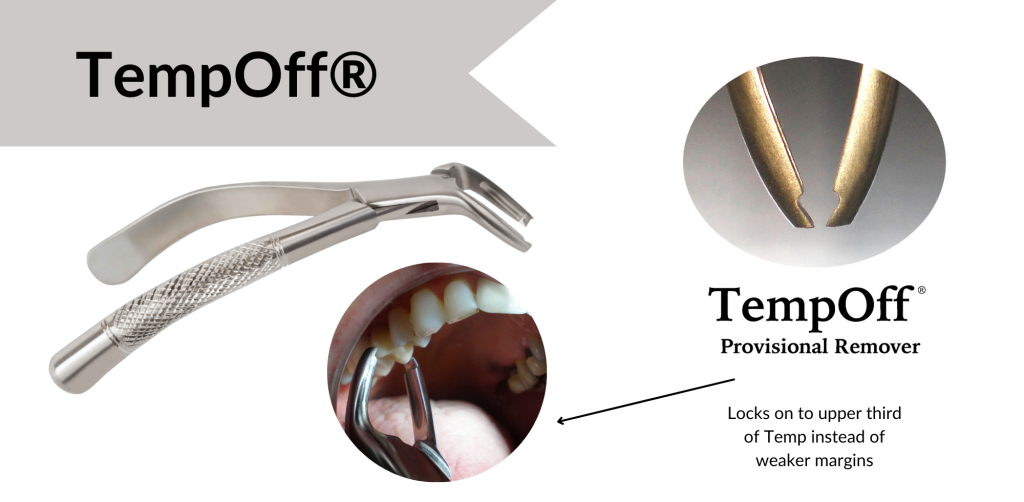
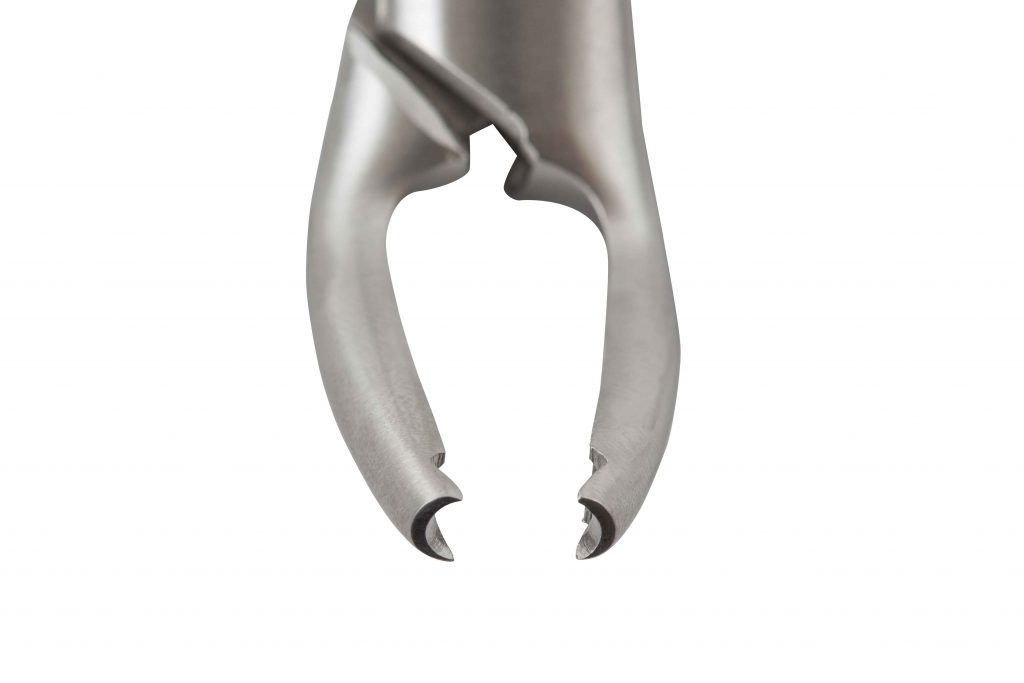
The 4 sharp points of contact on my TempOff® allows you to lock-on solidly to the provisional in the proper position- the upper one-third which is actually above the level of the underlying prep. You’ll be amazed at the solid grip you get the first time around.

Much less force is exerted on the tooth and build-up, and the lower two-thirds of the temp is free to flex out and break its own cement contact.  

When I started testing the final design of TempOff®, I was pleased to discover that I could remove most temps in 3-5 seconds, AND it was virtually pain-free for the patients.  

Because of the power of this tool, I only have to cut off provisionals two to three times a year at best.
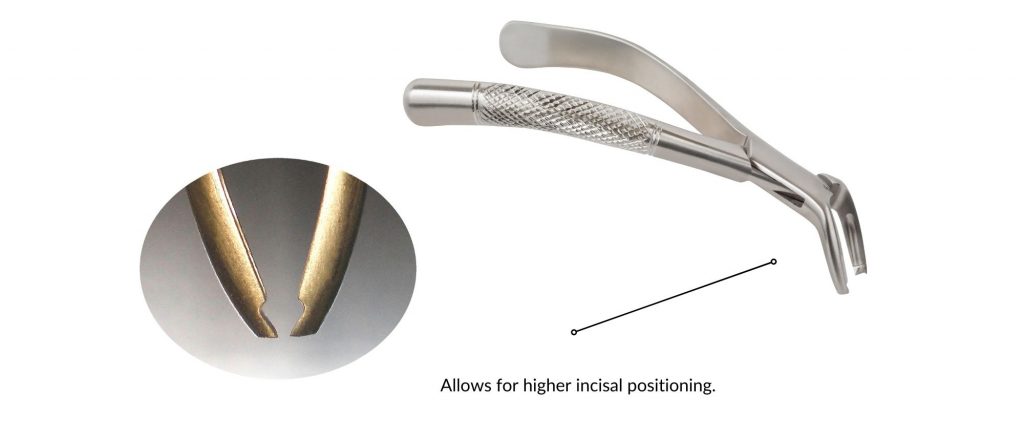

Why Dentists love this tool:

1.) Allows for higher incisal positioning
2.) Virtually no patient discomfort
3.) Unmatched in precision and performance
4.) Fast and reliable
Tool Advantages: I discovered over the years that temporaries were more easily removed if you locked onto them in the UPPER THIRD of the provisional- up and away from the margin.  Squeezing the temp near the gum line using hemostats and rubber-tipped instruments only makes things worse. 

Squeezing at the margin imparts a lot of unnecessary force onto the actual tooth and underlying build up.  Additionally, you are squeezing the thin part of the temp back onto the tooth, so you are working AGAINST yourself! 

Because you don’t have to squeeze the temp near the gum line, you can eliminate the pain and discomfort patients report when using hemostats or rubber-tipped instruments. Why use more force and risk damage to the underlying tooth and build-up when you don’t have to? Work smarter, not harder with TempOff®.
I take great pride in designing revolutionary dental instruments in the USA. Our inventions change the industry for the better. And, our TempOff® is just another example of this mission in action.

I truly believe that every dental office should be using instruments designed for their purpose, and for temporary removal that instrument is TempOff®.
Dental Elevator/Dental Extraction Tool

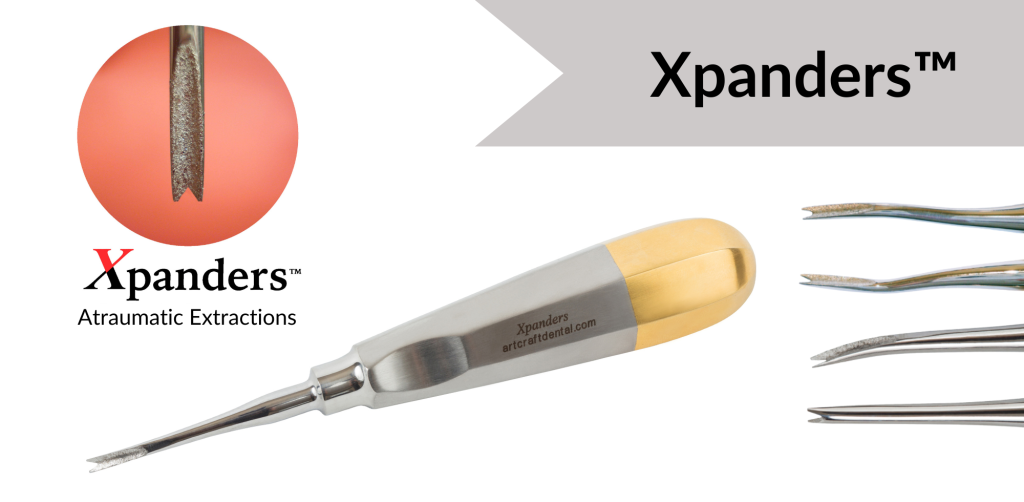
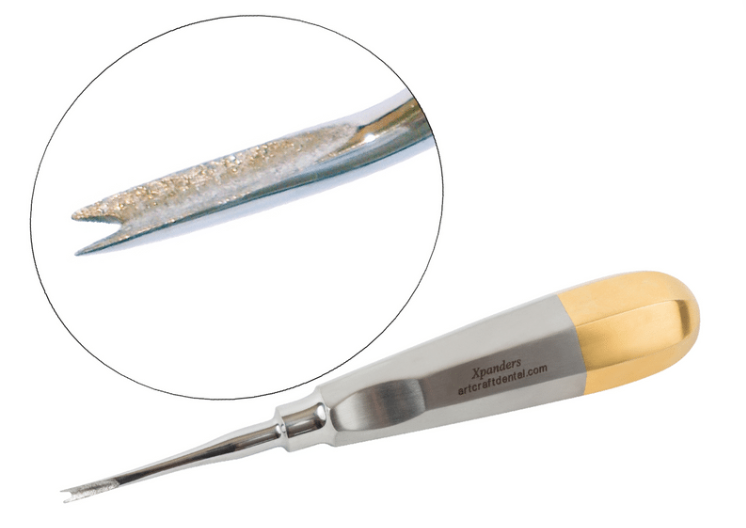
Over the years in practicing dentistry I have certainly had my share of stressful extractions and I am sure you have as well. Many of the newer so-called “atraumatic” dental elevators took far too long, so that added to patient discomfort. I created Xpanders™ to fill a need for an atraumatic, yet faster tool to use for extractions. I am proud to say that Xpanders™ are the most atraumatic elevators devised to date. I think you will find, thanks to Xpanders™, your extractions will be less stressful and more predictable also. 

I now use Xpanders™ on 90% of all of my extractions, and I have very few of the dreaded deep broken root tip mishaps, and I don’t have hardly any “fall behind schedule” extractions any more.

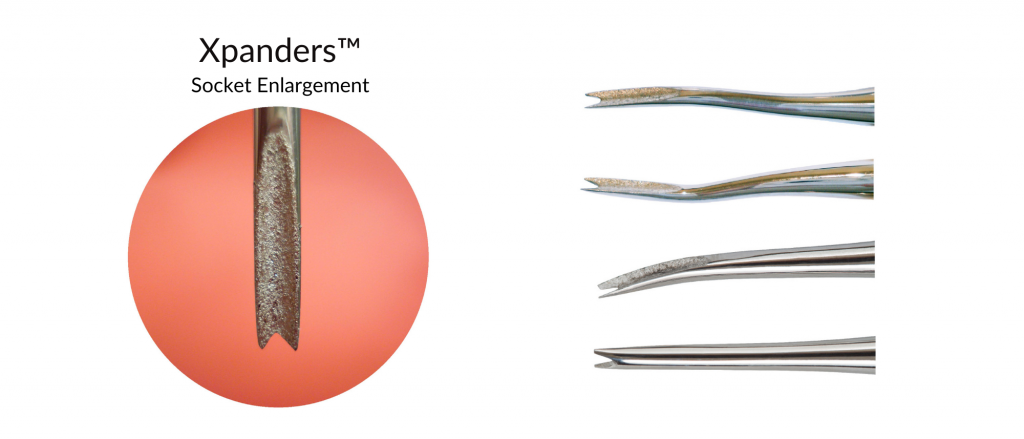
The double-pronged, diamond grip action allows for a stable two point contact between the crest of bone and the neck of the tooth. 

How it works:

The first step in any extraction and the ultimate goal of elevation is for you to make the tooth very, very mobile in all dimensions, and Xpanders™ do just that.  Because Xpanders™ only penetrate one-fourth to one-half millimeter into the bone or PDL space, they are less invasive than all other PDL-type instruments.  

The double prong action of these instruments gives the user a distinct advantage.  With insertion, then pushing and twisting of the instrument, one of the prongs acts as a purchase point by minimally entering the bone or PDL space, while the other prong swings around to push the tooth directly laterally.  

Why Other Dentists Love this Tool:

  • Atraumatic bone preserving elevators
  • Ideal for implant cases and future bridges
  • A must have for broken down, decayed roots

Tool Advantages:
While testing my prototype, I quickly discovered that Xpanders™ got the teeth moving much faster than other instruments in its class – especially if I alternated back-and-forth with my 301 straight elevator.  
This instrument truly gives you the power of 360 degree socket expansion.

Evolution of Atraumatic tools:
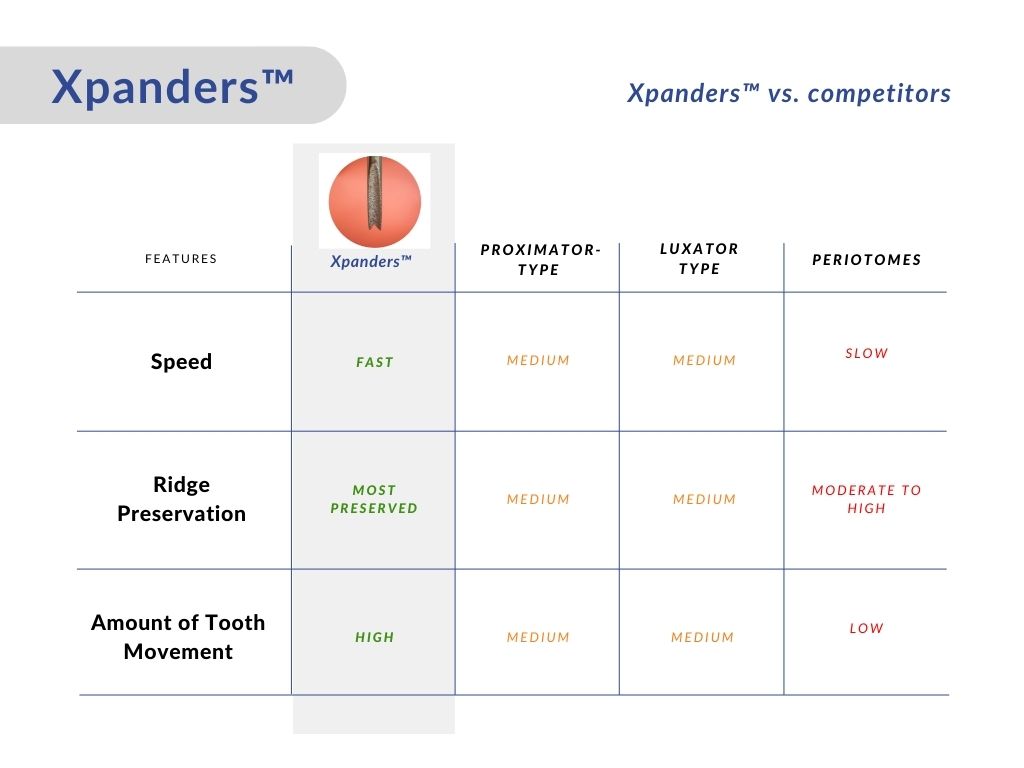
Since the advent of implants, extraction techniques have evolved dramatically over the years– mainly for the purpose of ridge and bone preservation.  Periotomes, proximators, luxators, and a variety of other instruments (PDL instruments) have been developed to create an entire category of “atraumatic” extraction tools.  
When I started using these “atraumatic” PDL instruments years ago, I liked the results and saw an improvement, but I began to notice that many of my extractions were taking much longer to perform (especially when periotomes were used).  Additionally, these instruments did not always work in many of the cases.  It was then that I decided to come up with a better, more efficient, and FASTER method, so Xpanders™ were born! 

Spear elevator, R and L root tip picks.

All of us dentists who do extractions eventually come across a very, very difficult case that takes 30 minutes, an hour, or even longer. 

It usually involves a tooth that is embedded in rock-hard bone, or some other situation that is present (ankylosis, brittle RCT teeth, severe decay below the crest, etc.). 

The practitioner has to “chase” the root tip all the way down to the apex because the root is breaking and breaking over and over.  These procedures are challenging and grueling indeed!

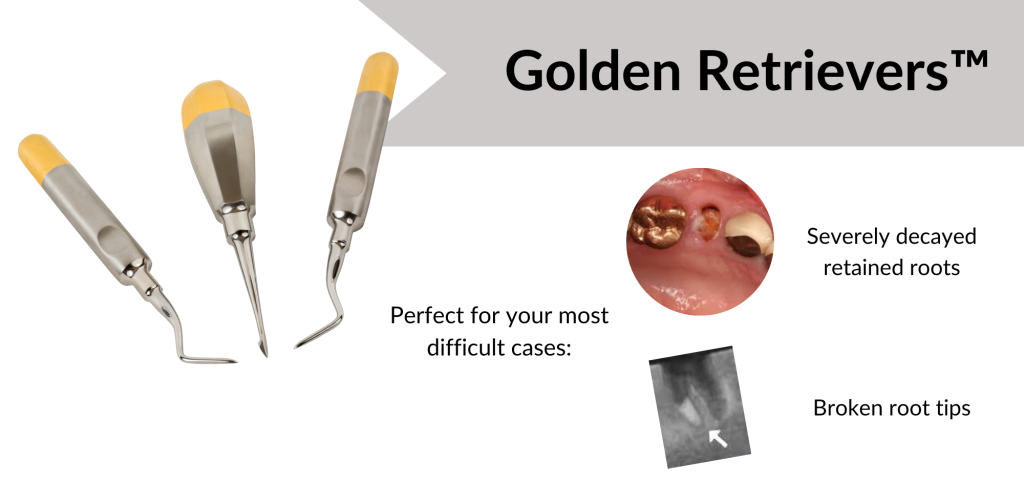
I have put together a set of three commonly used instruments with some added design improvements to help bail you out of these situations.  


Tool Advantages: This set of three tools when used in conjunction with a long flame-shaped diamond to make a notch or purchase point will literally save the day.  The spear elevator in the set has an ergonomic handle to allow easier, more efficient advancement into the PDL space.  The spear can be used on teeth that are severely decayed below the bone crest, because one needs to get down below the decay level to get onto sound tooth to be able to move it.  

Why Dentists love this tool:
1. Ergonomic palm handle design for more power. 
2. Serrated edges grip and hold onto the tooth
3. The smaller root tip picks allow for better access to deep, broken root tips.

From the very beginning of my career as a dentist over 30 years ago, dental instruments both intrigued and fascinated me.  I was always on the lookout for the “latest and greatest” in dental instrumentation.  From periotomes, proximators and luxators to apical retention forceps and castro viejos, I followed them all, and USED them all.  

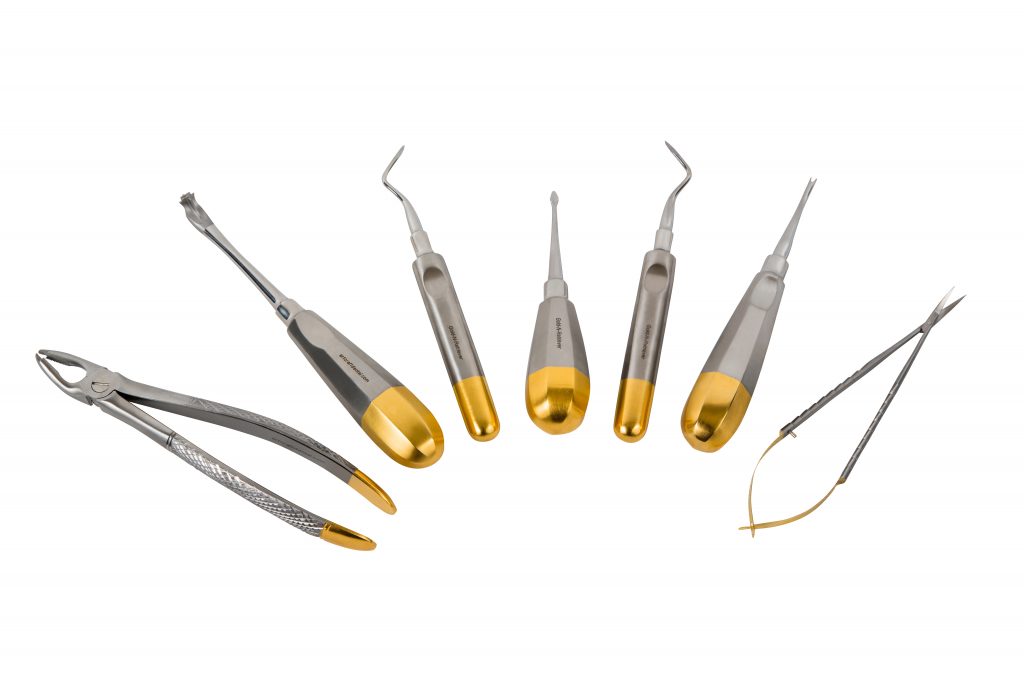
After much frustration with inefficient design and mediocre performance, I decided to embark on a quest to invent and design some instruments of my own.  Fast forward 30 years, many of my instruments are now used at dental offices across the world. Many of my tools are even used as the new standard in procedures including: TempOff®,  Xpanders™, Golden Retrievers™, Max Crown Spreader™, L-Vators™, and many more.

These instruments are a must have for the following common procedures: temporary removal, extractions, flap and suture placement, and composite filling placement.  For me personally, giving up these essential tools would be difficult and I would not want to practice without them.  

I feel that all of the tools that are available on my website www.artcraftdental.com  are the best designs available, and they make the practice of dentistry easier, more predictable, and less stressful.  

As a dentist for more than three decades, I have purchased, evaluated, and experimented with many dental instruments over the years.

Many are poorly designed, inefficient, and not properly intended for the procedure. That being said, I always come back to these three instruments, over and over again – as they have become the cornerstone of my practice.

#1: Xpanders™

Stop Luxating and start Xpanding in your practice. These elevator-type instruments make extractions easier, less traumatic, and are bone-preserving.  The double-pronged, diamond grip action of Xpanders™, allows for a stable two point contact between the crest of bone and the neck of the tooth. One of the prongs acts as a purchase point by entering a quarter to a half millimeter into the bone or PDL space, while the other prong swings around to push the tooth laterally.  Along with the 301 straight elevator, tooth movement in two dimensions is achieved, which as you know, is critical to any extraction.  

Atraumatic socket expander.

#2: TempOff®

Temporary Crown Remover

TempOff® is a powerful, revolutionary temporary crown remover that allows for higher incisal positioning so forces are transmitted to the temporary, not the tooth. This is way more efficient and faster as well – usually takes 2-3 seconds! The 4-points of contact give you solid, stable lock on to any provisional in the most efficient zone – the upper 1/3.  No slipping, no cutting off temps!

Many Dentists are now switching to TempOff® as their new standard in temporary crown removal procedures.

#3: Golden Retrievers™

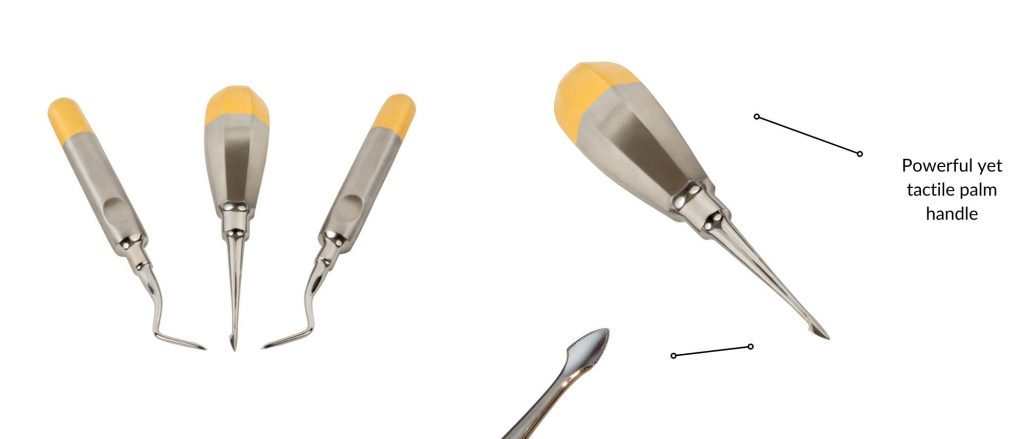
Spear Elevator (center) and R+L root tip picks

The Golden Retriever™ set of 3, is uniquely designed to bail you out of situations where you have a deep, broken root tip or a severely decayed root remnant.  This little set along with a long, flamed-shaped diamond used to make a notch or purchase point has saved me on countless occasions. Feel the power and control with the ergonomic palm-shaped handle of the Spear Elevator (center). Also included are the right and left root tip pics specially sized for the most efficient retrieval of broken root tips and badly decayed retained roots.

I would honestly feel lost if I walked into the office and my Top 3 were not available for use. I can not run my practice without them!

Q. What are some teeth whitening options that you recommend?

In short, I recommend three options.

Professional, in-office whitening

This procedure is done in the dental office setting and many offices offer it. You simply go to your dentist, sit in the chair for about 2 hours, and walk out with your teeth about 2 shades whiter. This procedure is painless and usually involves a special blue light shined onto your teeth. It is important to realize that if you do nothing to maintain your new color, you will typically rebound (go back to your original tooth color) in about 5 to 7 years.

At home whitening

In my opinion, this is the best and most effective way to whiten your teeth. First, schedule an appointment with your dentist to get fitted for a set of mouthguard-like trays. You fill these trays up at home and wear them for one hour a day for 10 days to two weeks. You can achieve 3 and in rare cases 4 shade of improvement in whiteness. You can purchase the gel at the dental office or drug store refill tubes of gel to refresh your teeth months or years later, if needed. Keep your trays! I usually recommend a charcoal toothpaste to keep them white indefinitely. Charcoal does an excellent job of maintaining color and preventing the teeth from rebounding back to their original color.

All-natural whitening.

This is usually done with activated charcoal found in the all-natural toothpastes (more on charcoal here). You may only get one shade of improvement with this method, but charcoal is what I always recommend for maintenance. If you whiten your teeth conventionally and want to KEEP them white, use charcoal toothpaste once a week. This will keep those pearlies white naturally, without all the side effects that come with the use of conventional bleaching chemicals.

Whitening Strips

Over the counter products provide a cheaper alternative to dental office visits, but the results are only average in comparison. Rather than purchase a kit with trays that usually do not fit, I would recommend Crest White Strips for a more affordable alternative.

First of all, do not confuse activated charcoal with those little briquettes you use to cook burgers and steaks.  Also, it should not be confused with coal which is a petroleum product.  Activated charcoal is completely different.  It is used in a wide variety of cosmetic, health, and medical products.  It can also be used as a water filter, and, interestingly, it can be completely ingested by humans to be used as poison antidote. (The activated charcoal is very, very absorbent, so poison molecules are absorbed into the charcoal and rendered neutral, so that the human body cannot absorb them.)

How is it made?

Step one in creating activated charcoal is the heating of plain wood (sometimes coconut shells and bamboo are used too).  The material is heated up to high temps in special ovens of flues, so as to remove water and reduce the wood to mostly carbon.  The material is further treated with certain gases and steam to produce the final product, activated charcoal which is a light, very absorbent black powder.  

Why does it work?

The significant property of activated charcoal is its porous quality and huge surface area.  Just one ounce of material has more surface area than 20 acres of land! Activated charcoal is like a super-sponge; it readily absorbs many materials including tannins which are those nagging chemicals in coffee and tea that stain your teeth so badly.  It is so new to the dental field that no comparative studies are out yet measuring its effectiveness at whitening teeth.  Many individuals swear by it and are touting its effectiveness, however, and pictures of actual cases are prevalent on social media outlets and the internet.   

How? Well, here are my main 3 takeaways:

  • Start young
  • Set a good example
  • Motivate positively

Let’s get into more detail. First things first – what NOT to do. Do not just brush their teeth for them if at all possible. Do not force your child to do anything they really don’t want to do. This will set up a long, push-pull cycle of negativity. Also do not let you child sleep with the bottle, as this creates a prolonged exposure of the teeth to sugar which causes cavities. Now here is what I DO recommend for my parent- patients, step by step (let’s not be too rigid – some flexibility is allowed!)

  1. Start as young as you want by showing them how you brush your OWN teeth. Siblings can be a
    positive influence too.
  2. Gradually start asking them, “Do you want to brush your teeth someday too?”
  3. When your child is ready, take them with you to the store or pharmacy and have them pick out
    their own toothbrush and toothpaste. Have them take ownership. There are many great
    products available that are just for kids.
  4. Now you can both brush your teeth together, side by side. Set a good example. Be creative.
    Use rhyming songs, choo-choo train analogies, laughter at the bubbles, etc. Try to demonstrate
    brushing using circular motions.
  5. Work with your dental hygienist to gradually improve and perfect their techniques as they get
    older.

Your child’s first visit to the dentist should be at age 1 or soon after. Not a lot will happen at that initial
appointment, but it introduces them to the idea of visiting the dentist. By visiting early, you are creating
(form the child’s perspective) a safe, fun Doctor-patient relationship. If, however, you wait until your
child is 2+ years old, then he or she may have some degree of anxiety with the idea of visiting.

Well, that’s it. Happy brushing!